(Translated with DeepL)
Hi there. This is Temmusu @ Dosukoki Ichibanboshi.
This is the walkthrough of Lost Eidolons, which has been hot in some neighborhoods (I guess…).
There are 27 chapters in total in the Lost Eidolons. I finished this game with “Normal” difficulty and “Maniac mode”.
This page is the memo when I cleared the game. Actually, I achieved to finish without any companions death through the game by the following method.
Please forgive me if I use only text and not many pictures.
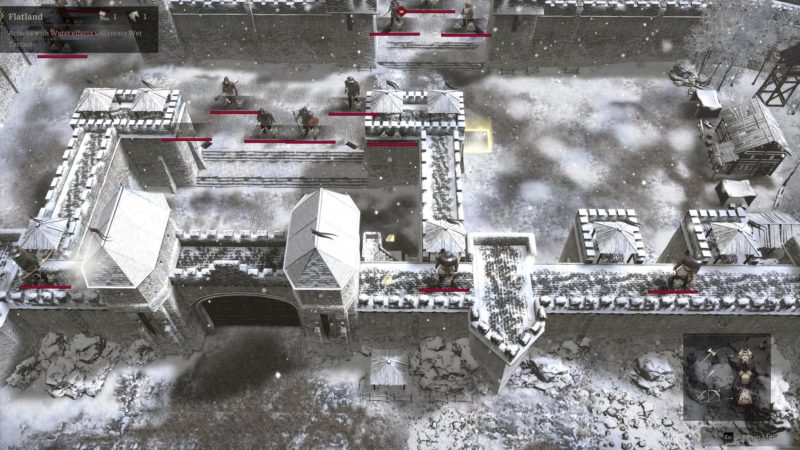
Chapter 11 (Ambush)
A mission in a flat area along a river.
After defeating the group in front of you, enemy reinforcements will appear. To stop the continuous appearing, you must turn off the beacon.
“Reinforcements? It’s a good way to gain more experience.” If you think so, you should reconsider that idea. You must turn off of the beacon as soon as possible.
Reinforcements appear every turn, and there are many of them at once. They are also on horses, so they can reach your group quickly, and they include spellcasters too, so if you stay the beacon on, you will be in over your head. Geez.
Chapter 12 (Into the Breach)
A monster hunting mission.
A large Anaspida will regain 50 HP every turn if it is on water. So, keep it away from the wet terrain. In addition, since Anaspida attacks at a range of 3 tiles in a straight line, you must scatter and do not line up in a straight line from the viewpoint of Anaspida.
If you kill them one by one, they are not so strong.
They sometimes lay eggs (ignore them when they are in the egg state), but you can kill them after they hatch into small Anaspida.
The unique spear available in this mission has a active skill (usable by equipping it) that is quite strong. It launches a heavy-damage water attack on four tiles (left front, center, right front and 1tile away from in front of you.). Enemy spellcasters will be killed by this single blow. Not only can it attack multiple tiles at once, but it can also make the involved enemy drenched, so it can be used in combination with lightning and ice magic combos. It is extremely useful and should be used in subsequent missions.
Chapter 13 (Hidden Depths)
A mission to attack a castle.
The first phase is to provoke the enemy and lure them out of the castle.
“Hold Positions.” and when the enemy comes out of the castle and is brought to the bottom of the screen, select “Commence the Attack!”. This will lower the morale of the surrounded enemies and reduce their attack power (but they are still quite strong).
If Eden and another ally who provoke the enemy have a mobility of 4, they will be attacked several times while they are being drawn in, so it is recommended to equip them with shields.
The tow provoked spellcasters closest to the gate can be killed in one shot by using the unique spear skill obtained last mission (if the one with the strong physical attack stats like Francisco or Robere).
Around this time, some of the allies will be able to use Lv10 elemental magic “Torrential Rain” is a 3×3 range magic that will also flood the area, so it should be used in conjunction with the lightning and ice combo.
All you have to do now is to defeat the remaining enemies.
Edie, who is in the castle, can be hired after the battle (don’t worry, she will not die even if you defeat him).
Chapter 14 (Enemy at the Gates)
A mission to attack the castle.
You must send one of your allies into the castle within the first three turns.
If you fail, not only will the castle gates close, but the morale of all the enemies will increase (their attack power will increase) and you will be in over your head.
Using Torrential Rain on the fire in front of you will open the way, just like Moses’ Ten Commandments. After the fire is extinguished, you can proceed straight ahead, which is much easier.
Even if your allies cannot use Torrential Rain, it is no problem.
You can still make it just in time by putting a strong defensive ally on a horse, bypassing from the left or right, and enter the door in at once.
There are small doors at the very left and very right of the gate that can be used as “ram gates”, but you can ignore them. It is easier to enter in go through the center.
Once enter inside the castle, divide the soldiers into left and right groups and proceed. The boss is not so strong.
There are two treasure chests, one next to the ballista and the other near the boss, so don’t forget them.
Chapter 15 (The Inquisitor)
Battle in front of the castle.
You will be busy in first half mission with reinforcements coming from both sides.
It is a good idea not to rush forward, but to maintain your formation while fighting them off. It may be a good idea to put obstacle on one side by using the elemental magic “Ice Wall.
Once the group in front of you and the reinforcements are defeated, the remaining enemies will launch a general attack.
Be careful of the battle mage Gustave, whose ranged attack Blizzard can be quite troublesome, so it is better to make him silence. The boss’s dark magic is not a threat.
Incidentally, if you attack the boss before defeating Gustave, Gustave will recieve damage instead of the boss, so you will have to defeat Gustave first anyway.
Chapter 16 (The Bloody Banquet)
If you raise Lion’s rapport to Lv. 2 before this mission, Francisco will give you a unique accessory at the next camp.
This mission is to escape from the pursuers of Ballaster’s army.
Equipped with Eden’s horse is a must. It will be a tough battle, so prepare your best member, class and equipment to fight.
On the 7th turn, reinforcements will appear from the bottom of the screen. When you enter the attack range of Godfray’s group in the upper part of the screen, reinforcements will appear from the left and right. Finally, a large number of reinforcements will appear from the upper right corner of the screen.
Do not try to attack the reinforcements and do not let them catch up to you. It is inevitable that some of your troupes will be defeated if they are hit (twice maybe). The first priority is to get Eden to the destination.
There is no time to lose, so advance anyway while maintaining a better formation you can keep.
Spellcasters in front of goal are a great hindrance. If you don’t defeat them, your progress will be impeded and one turn will be wasted.
So, when you reach the goal, send Eden and two archers (or spearmen) forward with him and defeat them as soon as possible.
By the way, Godfray can be defeated. He only drops a subtle items, though.
This mission is tough, but it is possible to complete it without any victims even in maniac mode.
Lion will leave permanently after clearing the mission (even if he survives the mission, he will not be able to avoid leaving).
Chapter17 (Biding Time)
Monster hunting. Though it is better to say “hunted” than “hunting”.
After defeating all Vermilith (worm-like enemies), you will have to fight against Behemoth (huge boar).
To prepare for this, you will need two healers who can use Blessing.
Vermilith will dive into the ground and then swallow the target’s companions and those adjacent to them. If you are unlucky, four people will be swallowed at once.
Once swallowed, unless the Vermilith is defeated, the swallowed comrades will not only be unable to join the battle, but will also take heavy damage each turn.
Since multiple Vermiliths will try to swallow you at the same time, if you are seriously eaten, the number of your companions who can fight will be reduced and you will be out of control.
Blessing is an effective countermeasure: when a Vermilith attempts for a swallow attack, the target’s companions are given a target mark. This can be removed by using Blessing (or Purification). This way should make it fairly easy to defeat Vermilith.
After defeating all the Vermilith, the Behemoth will appear.
Behemoth is tough and hard to damage, and sometimes regenerates 50 HP.
Moreover, it has the ability to reflect damage inflicted on it. This reflective ability has two types: “Reflection of melee attack” turn and “Reflection of circular dew attack” turn. You can tell which one it is by looking at Behemoth’s status.
Aim at the enemy’s weak points to steadily inflict damage. The later the turn, the more damage you can inflict (I felt so?).
Behemoth also uses sleep breath and it hits with huge damage right after, so use Blessing to cancel it before it hits you and evacuate the area.
While fighting the behemoth, Francisco will talk to you. Then, hit the behemoth with Eden’s special skill. It won’t do much damage, but you will get a unique sword after the battle.
The Unique Sword’s unique skill is a lightning attack with a range of 1-2, which at first glance doesn’t look like much, but the damage is solid. It is especially deadly against Drenched opponents.
Chapter 18 (The Return)
A siege mission.
At the beginning of the mission, you are told to reach the destination on the far right without being noticed by the enemy, but it is easier to ignore the instructions if you just want to capture it (if you want to unlock a achievement, you should follow the instructions). You can attack the enemies in the vicinity as soon as possible.
In addition to the boss battle, there are two powerful enemies, Eris and Fontaine, in this area, so be on your guard.
If you want to hire Fontaine, clear the mission without defeating him (he will become your ally after this battle is cleared; Eris will become your ally even if you defeat her).
The boss is the type that you have to wipe out the other enemies to get through the damage. However, the tanky Fontaine often comes to the front and won’t let you through (our attacks don’t reach the spellcasters), so you may go to attack from both the left and the bottom.
Dark magic “Nightveil” was useful when attacking and defending near the castle gate and attracting enemies around the boss. It can cause 8 damage each turn, making it easier to defeat enemies.
Don’t forget that there is one tresure chest at the bottom left of the boss (in the shadow of the castle wall).
Chapter 19 (The Invitation)
The battle inside the castle.
Two healers are needed to distribute the soldiers to the left and right sides of the castle.
When you open the doors on the left and right before the boss, reinforcements will appear in the center. If you can disperse your troops and advance from both sides to disperse the reinforcements to the left and right, it is not so scary.
This is not a particularly difficult stage, but the enemy sorcerer uses Firestorm (3 x 3 tile range magic) from this mission onward, so it is important to take countermeasures against spellcasters.
The boss uses Blizzard (3×3 tiles, freezing if Drenched). If you get close to him, he will use Brumal Strike (freezing with one shot). Be careful because of its strong attack power.
Chapter 20 (Clean Sweep)
A battle on level ground.
You need two warlocks equipped with Silence (at least one).
Until you fight the boss group, you will encounter a lot of reinforcement. Keep your formation better.
The hardest part of this mission is the three spellcasters who follow the boss: Hugues (Sorcerer), Nora (Bishop), and Cesare (Warlock).
Just using ranged attacks such as Firestorm, Blizzard, and Dark Burst is disgusting.
But the real crux of the matter is that if one of the three is defeated, the remaining members will set up an instant death spell.
They have a good amount of defense and are not easy to defeat, so after defeating one of them, it is a good idea to silence the rest with Silence. This will seal it off.
As for the boss, just surround him and hit him. Since he is on horseback, you can either damage him with Abyssal Whisper, a dark magic, or hit him after lowering his physical defense with Putrefy, also a dark magic.
That’s all for this time.
Thank you very much for reading this far.
See you soon. Have a good day.